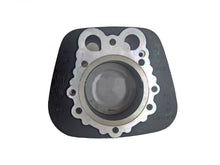
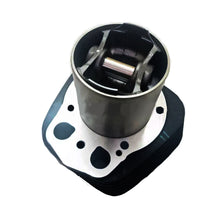
Royal Enfield Cylinder Piston kit for  Classic 500 cc
  • Load image into Gallery viewer, Royal Enfield Cylinder Piston kit for  Classic 500 cc
  • Load image into Gallery viewer, Royal Enfield Cylinder Piston kit for  Classic 500 cc

Royal Enfield Cylinder Piston kit for Classic 500 cc

Regular price
Rs. 9,100.00
Sale price
Rs. 9,100.00
Regular price
Sold out
Unit price
per 

This Cylinder Piston Kit is suitable for  Classic 500,
Item Code-A600005/A

When maintaining or rebuilding an engine, it is essential to use kits that are specifically designed for the Royal Enfield Classic 500 cc. These kits typically include a cylinder, piston, piston rings, and gudgeon pin. To ensure reliability and longevity, it is recommended to choose reputable brands or OEM parts. Be sure to check the bore size and stroke specifications to match the engine's requirements, and if you do not have experience with engine repairs, it is best to have a professional mechanic handle the installation for proper fitting and functioning.

For a hassle-free installation of the Royal Enfield Classic 500's Cylinder Piston kit, follow these expert tips and guidelines.

Tools and Materials Required:

  • Cylinder piston kit
  • Socket set
  • Torque wrench
  • Screwdrivers
  • Pliers
  • Gasket scraper
  • Engine oil
  • Anti-seize compound
  • Cleaning rags
  • Service manual (for specific torque settings and procedures)

Steps for Installation:

  1. Preparation:

    • Ensure the motorcycle is on a stable stand or lift.
    • Disconnect the battery and drain the engine oil.
  2. Remove the Fuel Tank:

    • Unscrew and remove the fuel tank to access the engine components.
  3. Remove the Cylinder Head:

    • Detach any components attached to the cylinder head, such as the carburetor and exhaust manifold.
    • Remove the cylinder head bolts in a crisscross pattern to avoid warping. Keep track of the bolts and their locations.
  4. Remove the Old Cylinder and Piston:

    • Once the cylinder head is off, remove the cylinder by unscrewing the cylinder base bolts.
    • Take out the piston and connecting rod assembly by removing the circlips and pushing the piston pin out.
  5. Clean the Surface:

    • Clean the mating surfaces of the engine block and the cylinder head. Remove old gasket material with a gasket scraper, but be careful not to scratch the surfaces.
  6. Install the New Piston:

    • Place the new piston into the connecting rod. Ensure the piston rings are properly installed and aligned.
    • Lubricate the piston and cylinder with a bit of engine oil.
  7. Install the New Cylinder:

    • Carefully slide the cylinder over the piston. Make sure the piston rings do not get damaged.
    • Install the cylinder base bolts and tighten them to the manufacturer’s specified torque settings.
  8. Install the New Cylinder Head:

    • Place the cylinder head onto the cylinder and align it correctly.
    • Install and tighten the cylinder head bolts in a crisscross pattern to the manufacturer’s specified torque settings.
  9. Reassemble the Motorcycle:

    • Reattach the fuel tank and any other components removed earlier.
    • Reconnect the battery and refill the engine oil.
  10. Check and Start the Engine:

    • Before starting, check all connections and make sure there are no leaks.
    • Start the engine and let it warm up. Check for any unusual noises or leaks.
  11. Test Ride:

    • After the engine has warmed up and you've checked everything, take the bike for a test ride to ensure it runs smoothly and performs as expected.

Tips:

  • Always refer to the Royal Enfield Classic 500 service manual for specific torque settings and detailed instructions.
  • If you’re unsure about any step, it’s a good idea to consult with a professional mechanic to avoid potential damage to your engine.

This guide provides a general overview, so make sure to follow any additional instructions specific to your bike model and kit.