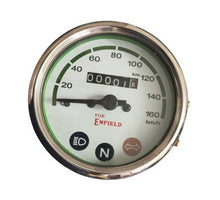
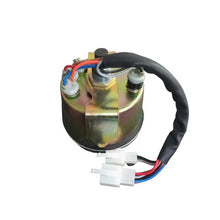
Royal Enfield Motorcycle Speedometer For Electra
Suitable For Bullet Standard & Electra
Item Code-678
If you’re looking for a white dial speedometer for a Royal Enfield Machismo or Electra, you have a couple of options:
-
OEM Replacement: Check with Royal Enfield dealerships or authorized service centers for original equipment manufacturer (OEM) parts. They may offer a white dial version or be able to source one for you.
-
Aftermarket Options: There are several aftermarket companies that specialize in Royal Enfield parts. Websites like almosauto.in, bikenwear.com and eBay, or motorcycle-specific retailers might have compatible white dial speedometers.
-
Custom Modifications: If you’re into DIY projects, you could also consider modifying your existing speedometer or creating a custom one. This could involve painting the dial or using a vinyl wrap.
Installing a speedometer on a Royal Enfield Machismo or Electra can be straightforward, but it requires some attention to detail. Here’s a general guide to help you through the installation process:
Tools Needed:
- Screwdrivers (flat and Phillips)
- Wrench set
- Pliers
- Electrical tape
- Multimeter (optional)
Installation Steps:
-
Preparation:
- Ensure the bike is on a stable surface and turn off the ignition.
- Disconnect the battery to avoid any electrical shorts.
-
Remove the Old Speedometer:
- Locate the speedometer on the handlebar or instrument cluster.
- Remove any screws or bolts holding it in place.
- Carefully detach the speedometer cable from the back of the old unit. You may need to twist it to release it.
- If applicable, disconnect any electrical connectors.
-
Install the New Speedometer:
- Connect the speedometer cable to the new speedometer. Ensure it’s securely attached.
- If the new speedometer has electrical connectors, match them with the existing wiring harness. Refer to the wiring diagram if available.
- Mount the new speedometer in the same location as the old one, securing it with screws or bolts.
-
Reattach the Battery:
- Once everything is connected, reattach the battery and turn on the ignition to test the speedometer.
-
Testing:
- Take the motorcycle for a short ride to ensure the speedometer is functioning correctly. Check that the needle moves appropriately and that any additional functions (like odometer or trip meter) are working.
-
Final Touches:
- Once confirmed that everything is working, secure any loose wires with electrical tape or zip ties to keep them tidy and out of the way.
Tips:
- Refer to the service manual for your specific model for detailed instructions and wiring diagrams.
- If you're unsure about electrical connections, it might be worth consulting a mechanic.
- Keep all original screws and parts in case you need to revert to the old speedometer later.


